Animation Tab Guide
The Animation tab provides tools for creating, editing, and playing step-based animations, including camera recording, transform effects, fade/transparency/color/flash transitions, annotation and media insertion, capture operations, and playback controls.

1. Full Screen
1.1 Function
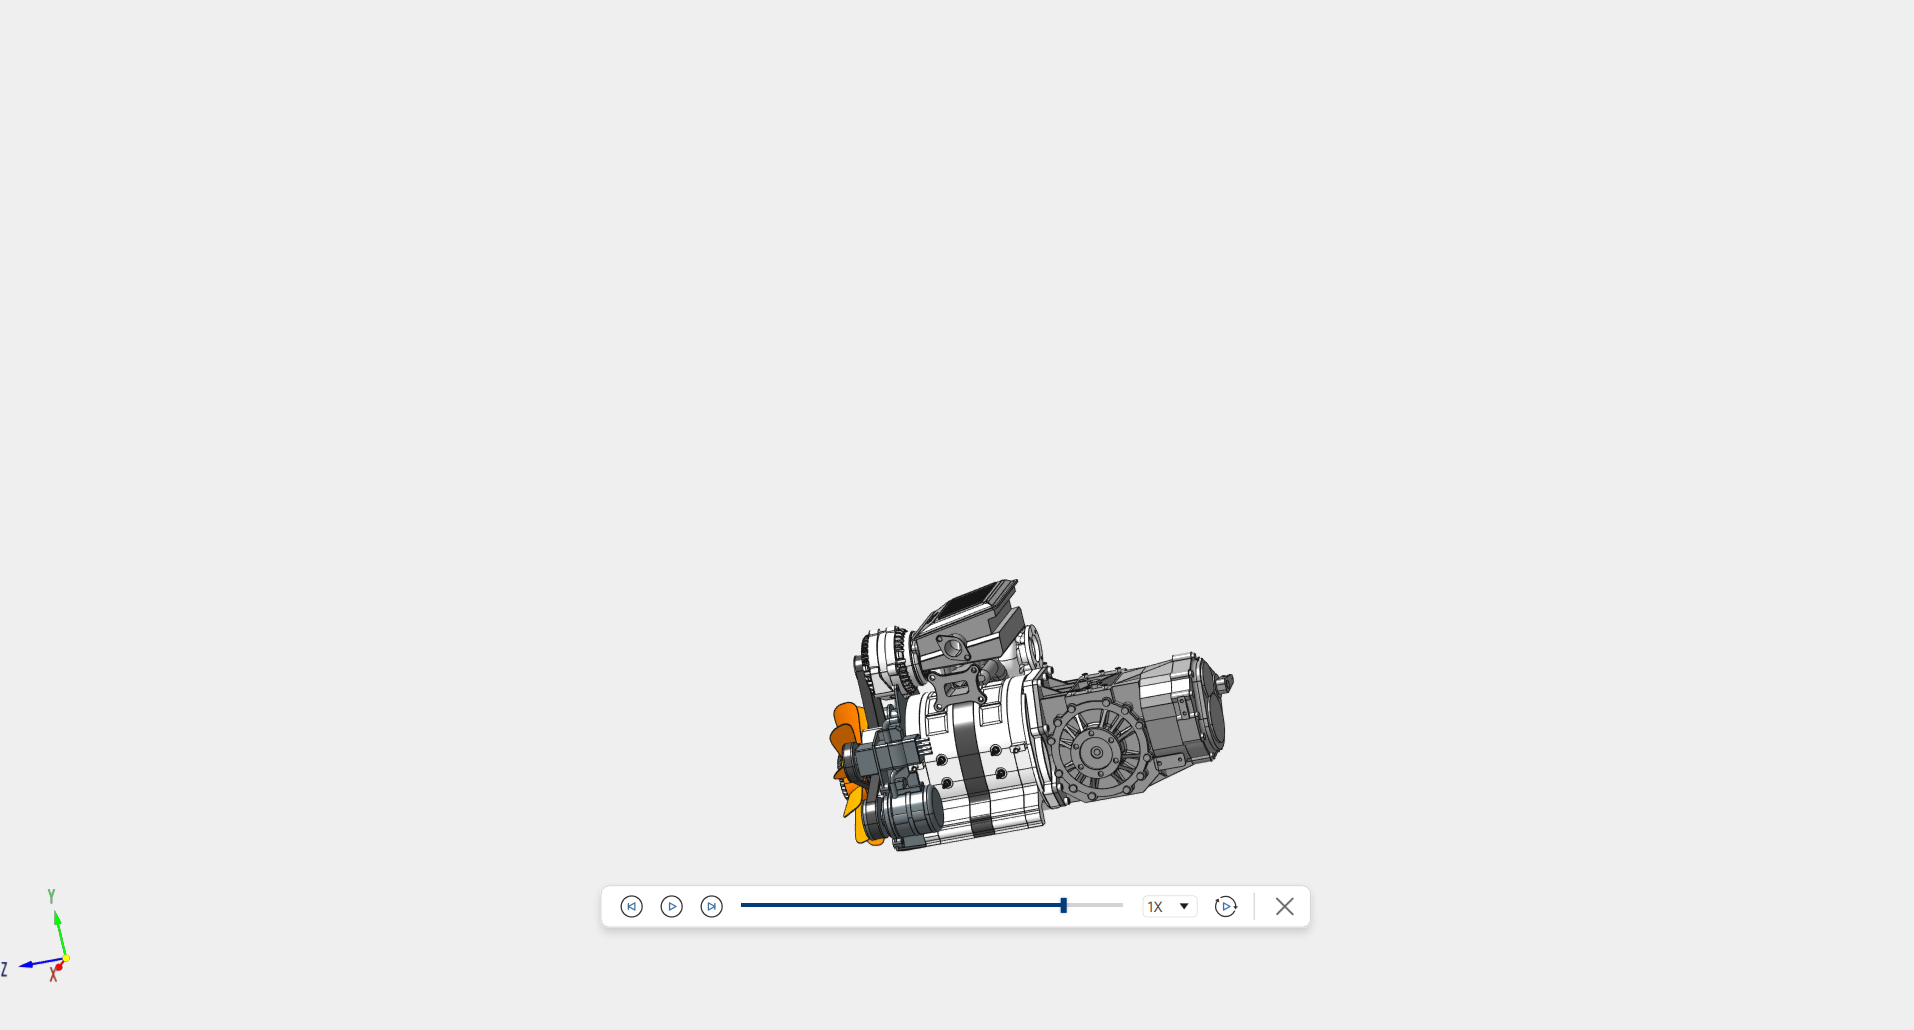
Plays the animation in full-screen mode. A floating control bar appears at the bottom of the screen during playback, providing full playback control without leaving the full-screen view.
1.2 Operation
- Open a file that contains animation data.
- Click Play in the ribbon to enter full-screen playback mode. The scene resets to its initial state and all selection highlights are cleared.
- A floating control bar appears at the bottom of the screen. Use it to control playback, adjust speed, toggle loop, and exit full-screen.
- Click Close (×) in the control bar to exit full-screen and return to the editing view.
1.3 Control Bar Buttons
- Previous (⏮): Jump to the beginning of the previous process or step.
- Play / Pause (▶ / ⏸): Toggle between playing and pausing the animation.
- Next (⏭): Jump to the beginning of the next process or step.
- Progress Bar: Drag the slider to scrub to any time position in the animation.
- Speed Dropdown (default 1×): Change the playback speed — 0.5×, 1×, 2×, or 4×.
- Loop (↻): Toggle loop playback on or off. When enabled, the animation restarts automatically after finishing.
- Close (×): Exit full-screen and return to the editing view.
1.4 Notes
During playback, clip-plane contour lines are automatically hidden and restored when playback ends.
2. Speed
2.1 Function
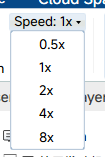
Sets the global playback speed multiplier from the ribbon, which also syncs with the speed dropdown in the full-screen control bar.
2.2 Operation
- Click the Speed dropdown in the ribbon.
- Select a speed multiplier: 0.5×, 1×, 2×, or 4×.
- The change takes effect immediately on the next playback.
3. Record / End Record
3.1 Function
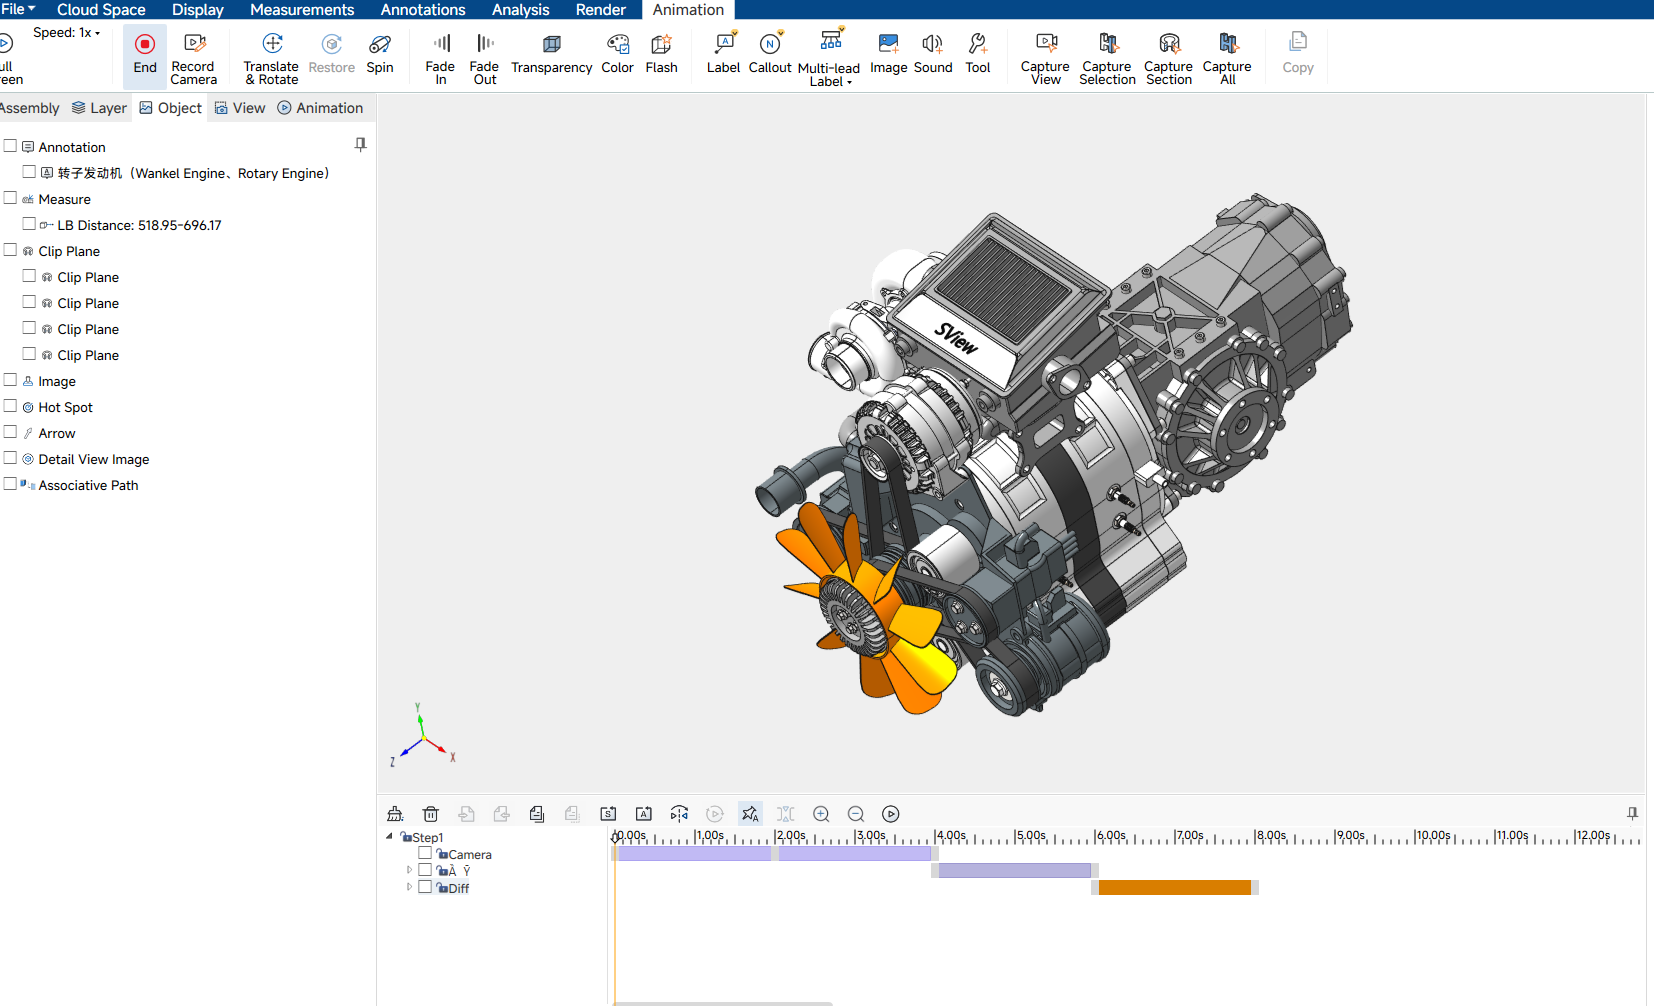
Toggles the recording panel (keyframe timeline editor) at the bottom of the workspace. While recording is active, subsequent effect commands (Fade In/Out, Transparency, Color, Flash, etc.) write keyframes into the current step.
3.2 Operation
- Click Record to open the keyframe timeline panel. Any currently playing animation is paused automatically.
- Use the timeline to navigate to the desired time position.
- Apply effect commands to record keyframes at the current time.
- Click End Record (same button in toggle state) to close the recording panel.
4. Record Camera
4.1 Function
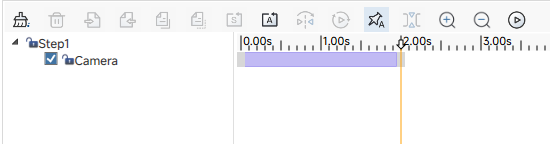
Captures the current camera angle and zoom as a keyframe. Both orthographic and perspective projections are supported.
4.2 Operation
- Adjust the 3D viewport to the desired camera angle and zoom level.
- Click Record Camera. The current camera state is recorded as a keyframe at the current time position.
- Repeat at different time positions to create a camera path animation.
5. Translate & Rotate
5.1 Function
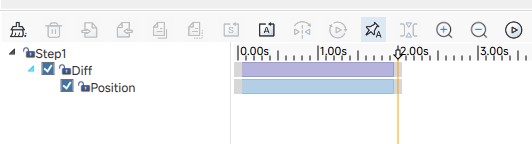
Moves and rotates selected parts in the 3D scene, generating position and rotation keyframes.
5.2 Operation
- Select the part(s) to move in the viewport.
- Click Translate & Rotate. A manipulator gizmo appears on the selected parts in the viewport, and the Translate & Rotate panel opens in Workshops.
- Configure motion parameters in the panel, or drag the manipulator directly in the 3D viewport to move or rotate parts interactively.
- The new position and rotation are recorded as keyframes at the current time.
5.3 Panel Parameters
- Models: List of parts currently bound to this motion command.
- Type: Translation or Rotation.
- Direction: Axis of movement (X / Y / Z / Face / Edge).
- Ref: Reference space — Global (world coordinates) or Part (local coordinates).
- Distance: Translation distance in mm.
- Angle: Rotation angle in degrees.
- Pivot: Pivot point for rotation.
- Adjust Azimuth: Fine-tune rotation around the up-axis.
- Use Origin: Use the model's local origin as the rotation center.
6. Spin
6.1 Function
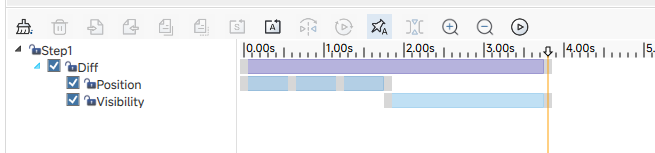
Records a screw-out or push-out motion for fasteners or assembly parts. The animation combines linear translation and rotation along a specified axis.
6.2 Operation
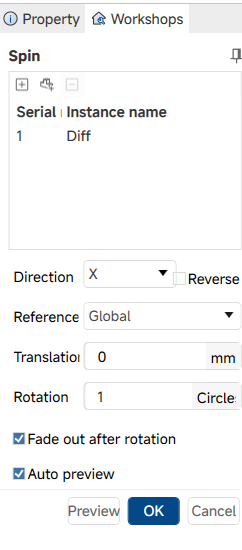
- Click Spin. The Unscrew panel opens in Workshops.
- Add the parts to animate using the Add button (single add) or Multi-Add button (batch add).
- Configure the motion parameters.
- Enable Auto Preview to preview the animation in the viewport as parameters are adjusted.
- Click OK to confirm and record the animation.
6.3 Panel Parameters
- Part List: Displays the index and instance name of each added part. Parts can be removed with the Delete button.
- Direction: Movement axis — X, Y, Z, Face (normal of a selected face), or Edge (direction of a selected edge).
- Opposite: Reverses the direction of motion.
- Reference: Coordinate reference —Global or Part (local axis).
- Translation: Linear travel distance (mm).
- Rotation: Number of rotations (turns).
- Fade Out After Rotation: When checked, the part fades out to invisible at the end of the animation.
- Auto Preview: When checked, the animation preview updates automatically when parameters change.
7. Fade In / Fade Out
7.1 Function
Records a visibility animation for selected objects. Fade In makes the object appear from invisible to fully visible; Fade Out makes it disappear.
7.2 Operation
- Select the object(s) to animate (supports models, hotspots, annotations, measures, and model boards).
- Click Fade In or Fade Out.
- A visibility keyframe is immediately added at the current time position in the timeline.
8. Transparency
8.1 Function
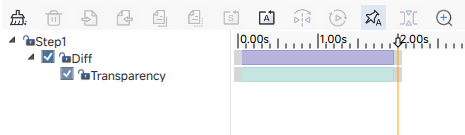
Records a transparency change animation for selected models. The model smoothly transitions from its current opacity to the specified target value.
8.2 Operation
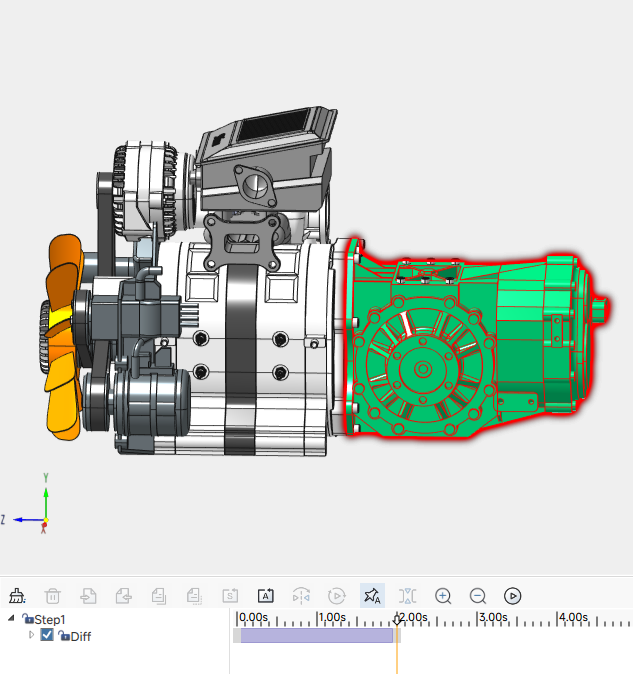
- Select the model(s) to animate in the viewport.
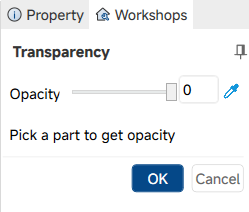
- Click Transparency. TheTransparency panel opens in Workshops. The current opacity of the last selected model is automatically reflected in the panel.
- Set the target opacity via the slider, text box, or Pick Opacity toggle.
- Click OK to record the opacity keyframe at the current time.
8.3 Panel Parameters
- Opacity Slider: Drag to adjust opacity; 0.0 = fully transparent, 1.0 = fully opaque. Changes are previewed live in the viewport.
- Opacity Text Box: Directly input a decimal value (0.0–1.0). Values outside this range are rejected.
- Pick Opacity (toggle): When enabled, hovering over a model in the viewport samples and displays that model's opacity. Click to apply the sampled value and exit pick mode.
8.4 Notes
The original opacity of each model is cached and can be restored via Undo.
9. Color
9.1 Function
Records a color-change animation for selected models. The model transitions from its current color to the chosen target color.
9.2 Operation
- Select the model(s) to animate.
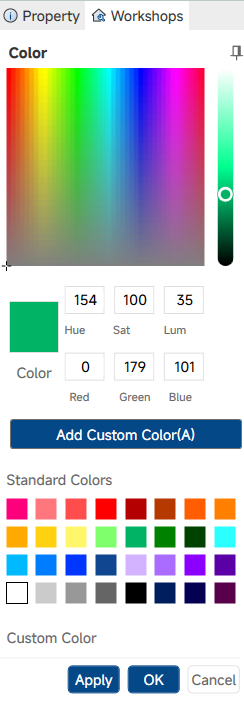
- Click Color. The Color panel opens in Workshops.
- Use the Color Picker to choose the target color. When a model is selected, the color picker automatically shows that model's current color.
- Click Apply to preview the color change in the viewport without closing the panel.
- Click OK to record the color keyframe.
9.3 Panel Parameters
Color Picker: Full-spectrum color selector with custom color support. Custom colors are saved per user.
10. Flash
10.1 Function
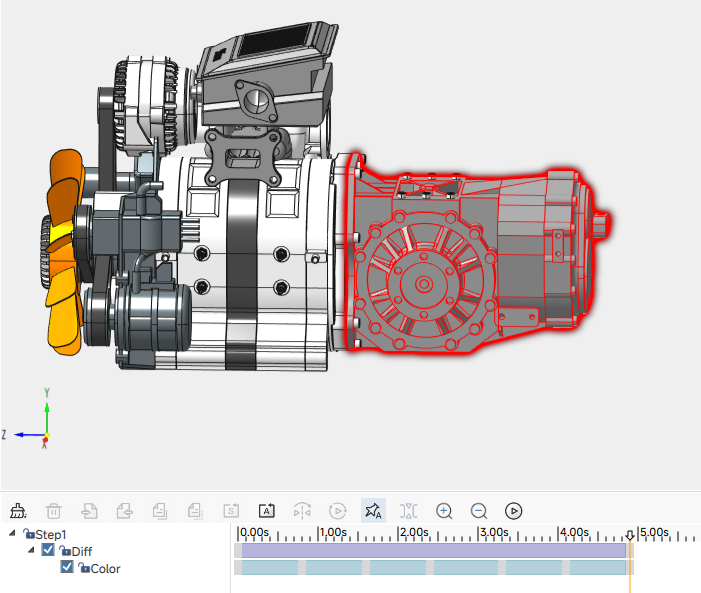
Records a blinking color effect on selected models. The model rapidly alternates between its original color and the specified highlight color for a defined number of cycles within a set duration.
10.2 Operation
- Select the model(s) to animate.
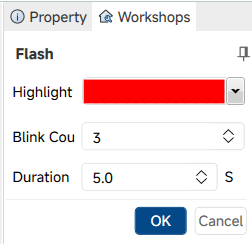
- Click Flash. The Flash dialog opens.
- Configure the flash parameters.
- Click OK to record the flash keyframe.
10.3 Panel Parameters
- Highlight Color: The color the object flashes to (color picker).
- Blink Count: Number of flash cycles (integer).
- Duration: Total duration of the flash effect in seconds.
10.4 Notes
The maximum blink count depends on the duration: max = (duration × 10 - 1) / 2. Exceeding this limit triggers a validation error.
11. Label / Callout / Multi-lead Label
11.1 Function
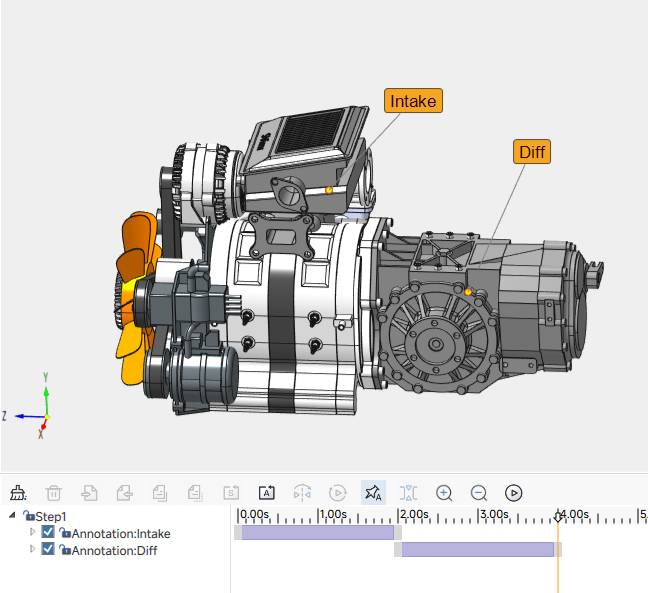
Records the appearance of annotation objects (labels, callouts, and multi-leader labels) as part of the animation sequence.
11.2 Operation
- Enable recording mode.
- Use Label, Callout, or Multi-lead Label from the Animation tab to create a new annotation at the desired time position. The annotation is recorded into the animation automatically.
- Alternatively, select an existing annotation and use Fade In / Fade Out to animate its visibility.
12. Image
12.1 Function
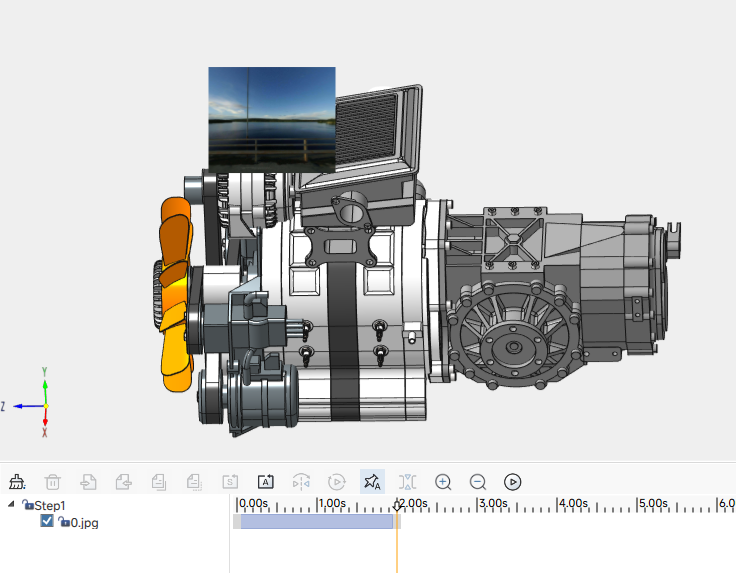
Inserts an image overlay into the animation at the current time position. The image is displayed as a 2D overlay on the screen during playback.
12.2 Operation
- Click Image. A file browser dialog opens.
- Select an image file (common formats: PNG, JPG, BMP).
- Drag to define the display region on the screen — position and size are set interactively.
- The image is inserted as a 2D overlay and a visibility keyframe is recorded at the current time.
12.3 Notes
The same image file can only be inserted once per animation.
13. Sound
13.1 Function
Inserts an audio clip into the animation at the current time position. The audio plays back automatically when the animation reaches that point during playback.
13.2 Operation
- Click Sound. A file browser dialog opens.
- Select an audio file (WAV format recommended).
- A sound keyframe is recorded at the current time position.

13.3 Notes
- The same audio file can only be inserted once per animation.
- Sound duration is automatically detected and synchronized with the animation timeline.
14. Tool
14.1 Function
Generates a complete fastener-operation animation (e.g., screwdriving, hammering, wrench tightening) by combining a tool model movement with the corresponding part motion. This is a two-step wizard.
14.2 Step 1 — Select Tool
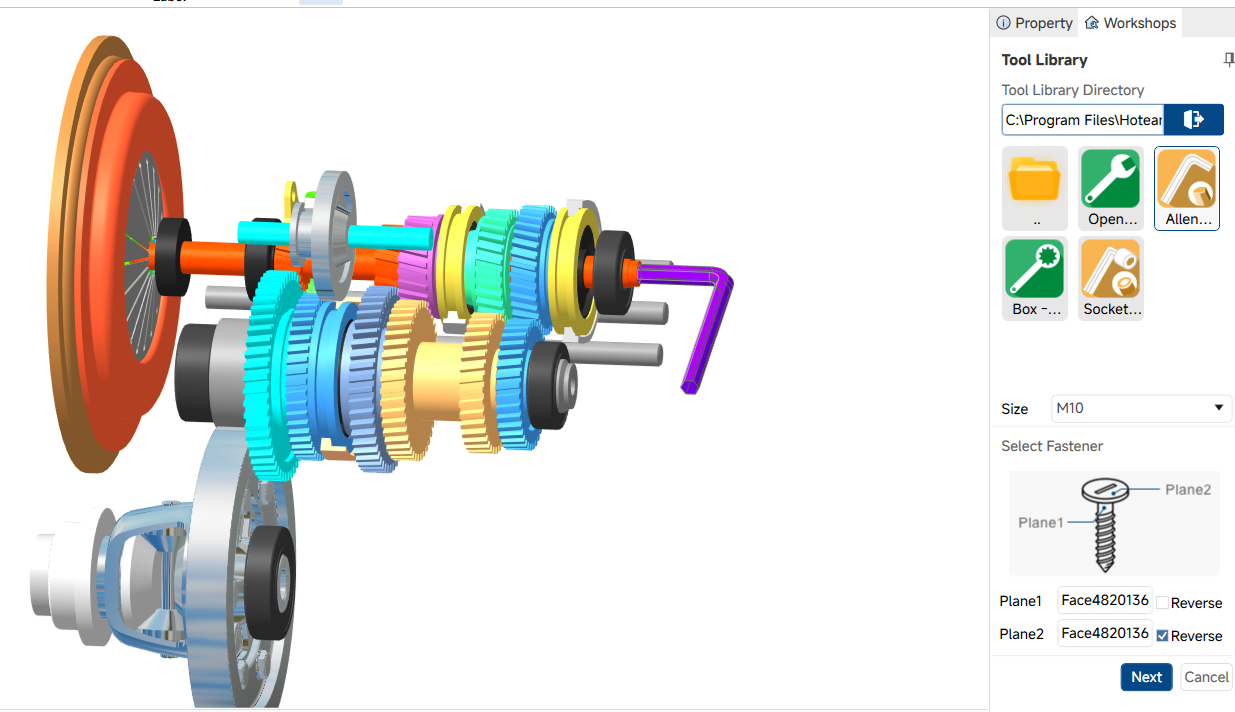
- Click Tool. The Tool Library panel opens in Workshops.
- Set the Tool Library Path by clicking the folder browser button to point to a directory containing tool model files.
- The available tools are displayed as thumbnail tiles. Click a tile to select a tool.
- Set the Tool Size from the dropdown if multiple size variants are available.
- Define the Plane 1 (X Direction) and Plane 2 (Y Direction) reference faces: click each input field to activate pick mode, then click a face in the 3D viewport to set the reference plane. The Opposite checkbox reverses the chosen direction.
- Click Next to proceed to Step 2.
14.3 Step 2 — Configure Motion
- Select the Motion Mode, then configure the corresponding parameters.
- Set the Entry Direction: Radial (approach from the side) or Axial (approach along the axis).
- Set the Playback Speed and enable Fastener Fade-Out if needed.
- Click Preview to review the animation in the viewport.
- Click OK to record the full tool animation sequence.
14.4 Motion Mode Parameters
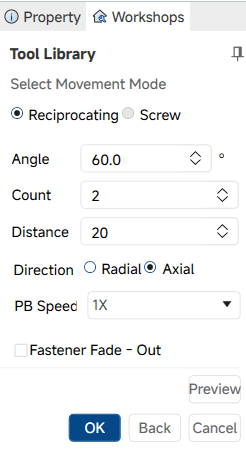
14.4.1 Reciprocating
The tool moves back and forth (e.g., a hammer).
- Angle: Swing angle per stroke (−180° to 180°).
- Count: Number of strokes (0–30).
- Distance: Travel distance per stroke (mm).
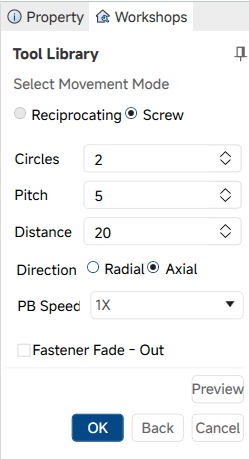
14.4.2 Screw Motion
The tool rotates while advancing (e.g., a screwdriver).
- Rotations: Number of full rotations (0.0–30).
- Pitch: Distance advanced per rotation (mm).
- Distance: Total travel distance (mm).
14.5 Other Parameters
- Entry Direction: Radial — approach from the side; Axial — approach along the axis.
- Playback Speed: 0.5×, 1×, 2×, or 4×.
- Fastener Fade-Out: When enabled, the fastener part fades to invisible at the end of the animation.
15. Capture View
15.1 Function
Records the current camera angle and zoom level as a keyframe.
15.2 Operation
- Adjust the viewport to the desired camera angle.
- Click Capture View. The current view is recorded immediately.
16. Capture Selection
16.1 Function
Records the current position and visibility of selected models as a keyframe.
16.2 Operation
- Select the model(s) to capture.
- Click Capture Selection. The position, rotation, and visibility of each selected model are recorded at the current time.
17. Capture Section
17.1 Function
Records the current state of all active section planes as a keyframe.
17.2 Operation
- Set up the section planes in the desired position.
- Click Capture Section. The position and orientation of all visible section planes are recorded.
18. Capture All
18.1 Function
Captures the camera view, selected model states, and section planes together in a single operation.
18.2 Operation
- Set up the camera angle, model positions, and section planes as desired.
- Click Capture All. All three states are recorded simultaneously.




全部评论